Single Selected Structure Functions
Once you select a Structure (pole or building), several options are available through a right-click of a mouse. Most of these are the same as the Structure Node in the Explorer Tree.
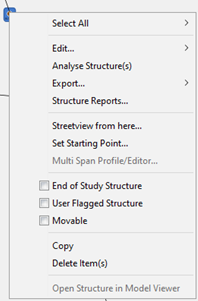
The added functions are the "Set Starting Point" and the flag options.
Set Starting Point
This option is the starting process for the Pole Sequence Loading function, for which you need to tell Quick Pole which structure to use as a starting point. Then select multiple structures in that direction (minimum 3 in total) for the Pole Sequence Loading function to become available.
End of Study Structure
The "End of Study Structure" feature allows you to ignore the loading analysis for specific poles. For many projects you will need to place additional poles to the ones you may be designing in order to capture the proper span length and determine the loads. An example would be that you are attaching communication messengers to poles 2 through to 6, but other span attachments (such as power) continue to poles 1 and 7. You need to place poles 1 and 7 in the Work Plan Area so that Quick Pole knows the attachment loads in those directions related to poles 2 and 6. You are not normally concerned about the structural capacity of poles 1 and 7 as they are not related to the work you are doing. Providing Analysis Results for these poles will be distracting from the poles where you are actually doing work.
These additional poles (1 and 7) are required to define the loads on the poles you are really interested in, but you don't need to analyze them. By right-clicking on a pole in the Work Plan View, you can check the "End of Study Structure" checkbox. These extra poles will be listed in the appropriate reports, but without their loading analysis results. This feature allows you to focus on the more important items of your project.
User-Flagged Structure
Use this checkbox to flag any structure that you may need to find easily in the future, via several methods. This can be useful if certain structures require additional attention, for any reason. It has no impact on any other feature.
Movable
Quick Pole is a GIS application with the added ability that it can be used in non-GIS situations as well. As a GIS application, the actual location of any item is usually fixed in the Work Plan Area. The location is then normally adjusted only by direct input of updated location information such as Northing/Easting or Longitude/Latitude. This can be done in the Coordinates Editor or one of the right-click options available.
When projects are first re-opened, the location of all items are "Not Movable" so as to prevent inadvertent movement by user actions. When new items are dragged from the Palette onto the Work Plan area, those items are movable until the next time the project is opened. Freehand movement is done by dragging the item with the left mouse button pressed. The Nudge tools at the top of the Work Plan Area are also available.
All or any item can be selected and have its Movable state changed so that it could be moved or fixed in place. You can right-click on any item and change its Movable State.

You can also select multiple items at the same time and change the Locked state of all poles, buildings and long distance anchors at the same time.

The CheckBox for the Movable State above is in an indeterminate state because some of the items selected are Movable and others are not. Selecting this menu item once will make these items Movable. Selecting the menu item a second time will make all items not Movable .