File Window
The Quick Pole User Interface
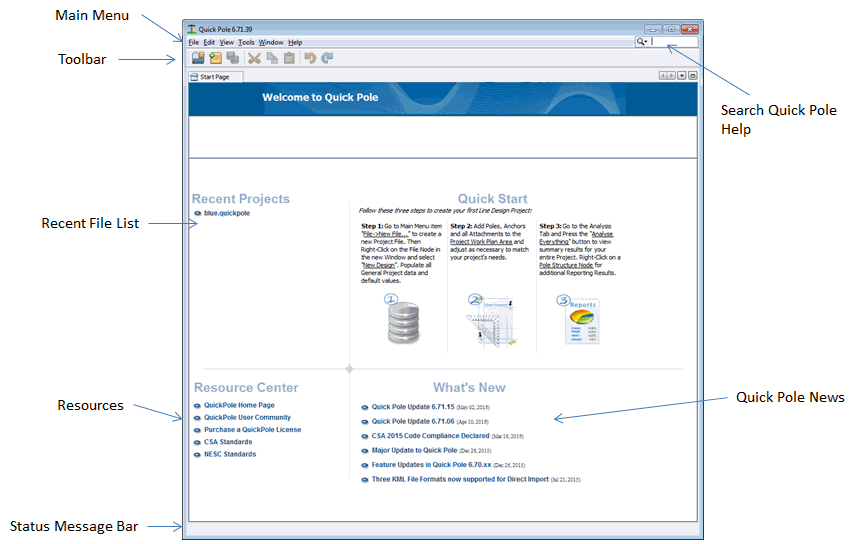
Knowing how to navigate around Quick Pole effectively will greatly improve your ability to use Quick Pole in general. Quick Pole’s User Interface is laid out in a similar way to many modern applications.
Window Areas
The Top Area contains:
- The Main menu where many core and global functions can be accessed. Some of these are “Context Aware”, which means they are enabled or disabled depending on what area of Quick Pole’s User Interface is currently active and is accepting user input (keyboard or mouse).
- The Main Toolbar, which provides easy access to some of the functions available in the Main Menu.
The Bottom of the Main window provides room for a Status Message, related to the current activity. It can provide hints for your next step, or information related to what was just completed.
The Left Hand Side contains the Project Explorer and Project Properties Window.
In this area you will search the Projects Database for the ones you want, open and otherwise Manage any Project.
The Project Properties area at the bottom of this window shows additional information about anything that is selected in this window.
The Start Page is where you can find News, Resources and the Recent Files List. It always opens as the first tabbed window when Quick Pole starts.
Window Flexibility
The various Windows within Quick Pole are very flexible from an arrangement perspective. While Quick Pole could be used with a computer with multiple monitors, there are features that you may also find helpful with just a single computer monitor.
The following are the main window functions you may choose to use. If you get something wrong that you have trouble changing back, there is a Main menu function called “Window->Window Reset” which will reset all windows to their original locations.
- Window Drag. You can left-click on the title bar of many windows and drag them to a different part of your screen, or to a completely different computer monitor.
- Window Minimize. Many windows have a minimize button that minimizes the window. This allows you to have greater space for other windows. These windows minimize to the left, right or bottom of Quick Pole’s Main window (not of your computer). Once minimized, moving the mouse over their minimized appearance will show the window again. To restore the window again, right-click on its title bar and choose “Dock Window”.
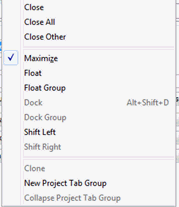
Right-clicking on the Title Bar of most windows will present some additional choices you may choose to experiment with. Float means that it will detach from its position within the Quick Pole Main Window and allow you to position it anywhere else you would like, including another computer monitor. This is very similar to the Window Drag feature.
Once a window is floating, it is said to be un-docked. You can restore the window to its original docked location by selecting the Dock or Dock Group option. The Group option simply allows you to move multiple windows from the same “Docked” location at the same time.
Main Menu Functions
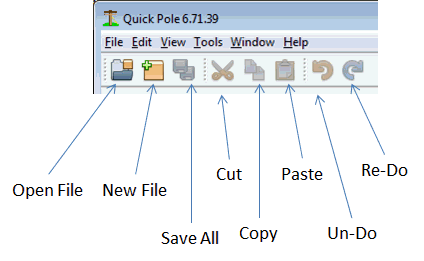
The top menu bar is always visible and available for use. However, certain menu choices (such as File or Design Functions) may be disabled if a File or Design related window, is not currently selected. This is called being “Context Sensitive”, since the menu adjusts to what you are currently doing.
The Toolbar directly below it provides a shortcut button for some of the more common menu functions.
The File Menu
Provides access to many functions used to manage project files. Quick Pole uses one file of type *.quickpole to store a complete project. This project file can contain multiple designs within it that usually relate to the same project.
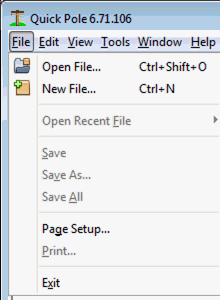
Open File...
This function will open your computer's standard "Open File" Dialog, where you can locate your project file from anywhere your computer can access. See "File Window" for more information.
New File...
This function will begin the process to create a new project file from scratch. When you activate this function, Quick Pole will launch a Dialog Box asking which Project Template you wish to use to create this Project.
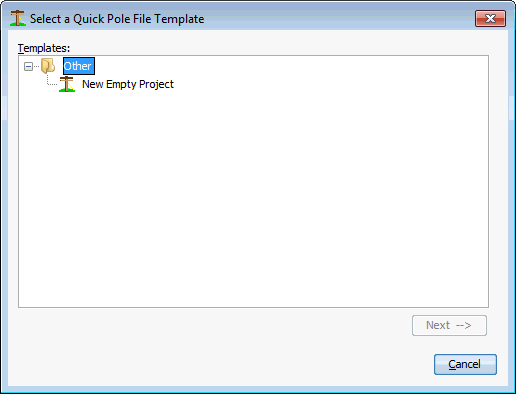
There is only one Template to choose from at this time. However this will be expanded in the future allowing you to create your own templates. It is envisioned that Users will want different templates to choose from based on the geographic area of the Project.
Sometimes the "Other" node in this Dialog will have a "+" sign to the right of it with nothing else underneath. If that is the case, use the left mouse button to click on the '+" symbol. This will expand the list so that you can see the choice of Templates. Then select the Template of your choice with the mouse, then hit the 'Next" button.
You will then be presented with a Dialog asking for the location and filename you wish to use for this project. You can store this file anywhere your computer can access.
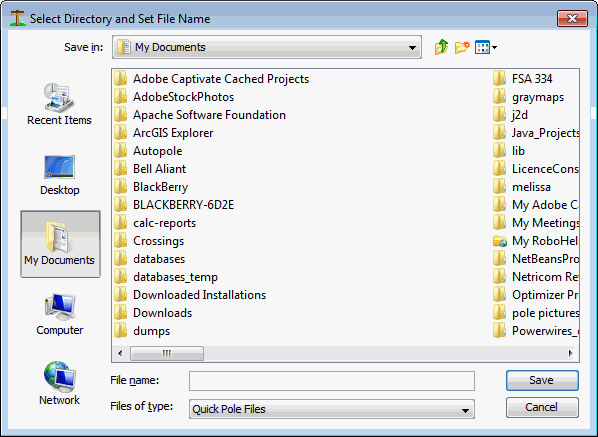
After pressing "Save", you will be presented with an open Window for this particular File. See "File Window" for more information.
Open Recent File ...
By moving your mouse over this menu item, a separate menu to the right will appear showing a list of recently opened Project Files. If you move the mouse onto one of the files in this list, it will open it for you. This list will match the list also shown in the 'Start Page", but its list may be longer.
Save, Save As, Save All
These menu items will be available only if there are open projects with modified content that has not yet been Saved. The Save and Save As menu items are context sensitive, meaning that they will adapt to the Project Window that currently has the focus.
Page Setup...
This function allows you to set the default Page Setup for Printing of some of the functions within Quick Pole. Reports have their own built-in Page Setup and will not be affected by the setting provided here.
Exit
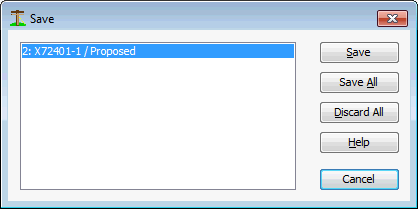
This function will popup a Dialog if there is any unsaved work in progress. You can use this Dialog to selectively Save any particular work you wish to save, or simply Save All unsaved work. If you wish to save just particular pieces of work, select the item in the list, then press the Save button. When you are done doing this for all work you wish to keep, press "Discard All" for the remaining items in the list. Quick Pole will then close.
The Edit Menu
Provides access to common editing functions. Depending on what window, node or Text User Interface component is in focus at the time, each menu item may or may not be enabled.
Select All
This function is useful when you wish to copy all text in an area for pasting into another program (such as MS Word).
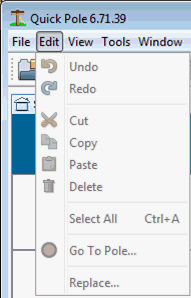
Go To Pole
This menu choice will popup a Dialog asking for a pole number. It will then highlight the first pole it finds with a pole number that contains the text entered; plus it scrolls the Work Plan Area until it is in view.

The View Menu

Full Screen
This will make Quick Pole take up the entire screen are of your computer monitor; similar to maximizing the Quick Pole Window.
The Tools Menu
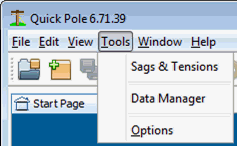
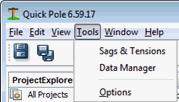
The Tools Menu provides access to two Advanced User tools:
- Sags & Tensions- In this tool you can string wires. Conductors, self-supporting cables and others to various tensions, under a variety of load conditions and elevations to determine their Sags & Tension values. See the Sags and Tensions Tool for more information.
- Data Manager – In this tool you can review the internal Reference Data that Quick Pole uses, plus modify some for your own use. See Data Manager for more information.
- Options - The last option in this menu enables you to personalize Quick Pole to your preferences. See Configure your Preferences for more information.
The Windows Menu
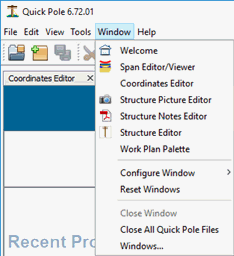
This menu allows you to directly select or manage various windows within Quick Pole.
Welcome:
This activates and makes visible the "Start Page".
Span Editor/Viewer:
This activates and makes visible the "Span Editor/Viewer" window. It is a stand-alone window that listens for you to select a pole span in an active project. Then allows you to add/edit or delete any span attachment, as well as view the Span Profile.
Coordinates Editor:
This activates and makes visible the "Coordinate Editor" window. It is a stand-alone window that listens for an active project to be open, then allows you to directly edit the exact location of pole, anchors and Buildings. It also allows you to import these same items using data files.
.
Structure Picture Editor:
This activates and makes visible the Window that shows the pictures stored against the currently selected Structure. This Window will change as different Structures are selected.
Structure Notes Editor:
This activates and makes visible the Window that shows the PDF Notes stored against the currently selected Structure. This Window will change as different Structures are selected.
Structure Editor:
This activates and makes visible the Structure Editor Window showing all data for the currently selected structure. This Window will change as different Structures are selected.
Work Plan Palette
This activates and makes visible the "Work Plan Palette" used for dragging poles, building, anchors onto the Work Plan.
Configure Window
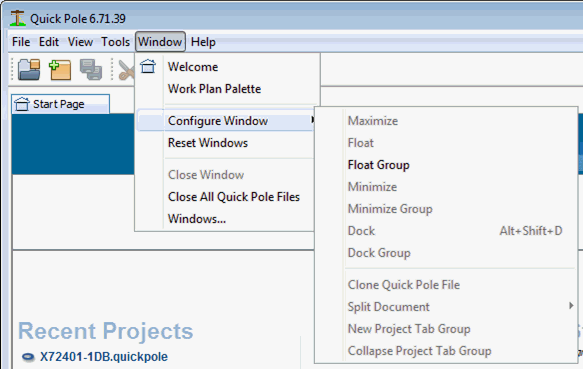
This function allows you to manipulate the currently open and selected window. The most common use is to "Float" a window to make it movable to other locations on your monitor, or to other monitors you may have. Dock resets a window from "Float" mode back to its normal position within the Quick Pole Main Window. Quick Pole remembers the location of your Windows for the next time you re-open Quick Pole.
Reset Windows
This restores the appearance of all open windows to factory settings.
Close Window
Closes the currently selected window. You will be prompted if there is unsaved Quick Pole project data associated with this window.
Close All Quick Pole Files
Similar to the "Close Window" function, all windows associated with Quick Pole files will be closed.
a named window of your choosing, alter the. In addition it allows you to reset the position of all windows in Quick Pole to their original position.
In addition to being able to close the currently open window or project, this menu also allows you to “Configure” the currently selected window; such as float, dock or maximize. These functions are also available my right-clicking on the windows title bar at the top of the window.
Windows...
Brings up a Dialog listing all open Windows for you to select to bring to front of all other Windows and make visible.
The Help Menu
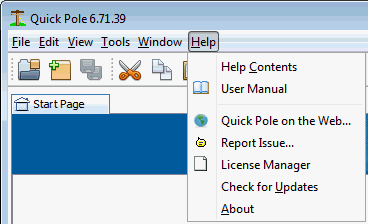
The Help Menu provides access to a number of functions you may find useful if you are having difficulty or are looking for some more information or explanation.
Help Contents
This brings up Quick Pole’s internal Help System. There you can search the Help System on what you are looking for, or simply browse different sections by Topic.
User Manual
This brings up the entire contents of the Help System in a pdf document and opens it directly for you. You can choose to save, print or anything else that your pdf viewer allows you to do. You may find it convenient, for example, to print out a section or topic to refer to while you are working with Quick Pole.
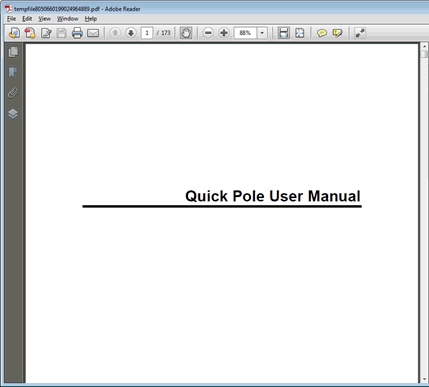
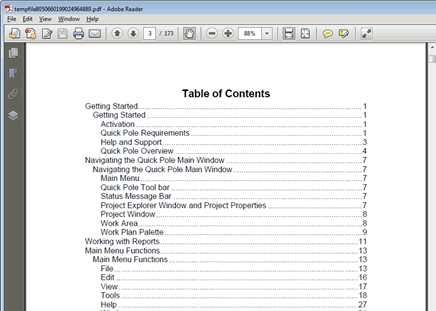
Quick Pole will ask your computer to open this document with the default program assigned for this type of file (.pdf). This manual has an indexed Table of Contents where you can go directly to the page of interest by clicking on the page number.
There are also a set of bookmarks embedded into the document that provide another method of browsing the content.
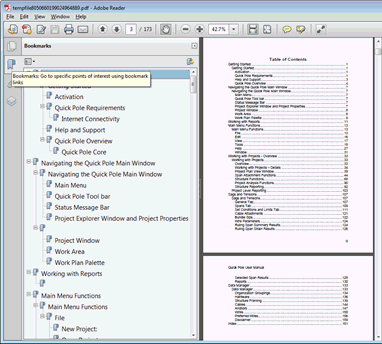
Your PDF Viewer may have a different way of displaying bookmarks than shown above.
Quick Pole on the Web
This menu choice will automatically open your default Internet browser and open up Quick Pole’s Home Page. There are different articles and information there that you may find useful.
Report Issue
In the unlikely event that Quick Pole fails to do what you expected it to do, or it presents you with a serious error, you can use this menu choice to tell the supporter of Quick Pole what happened and what you were doing at the time. Sonideft will get back to you with a possible work-around suggestion and/or a time line as to when to expect a full solution.
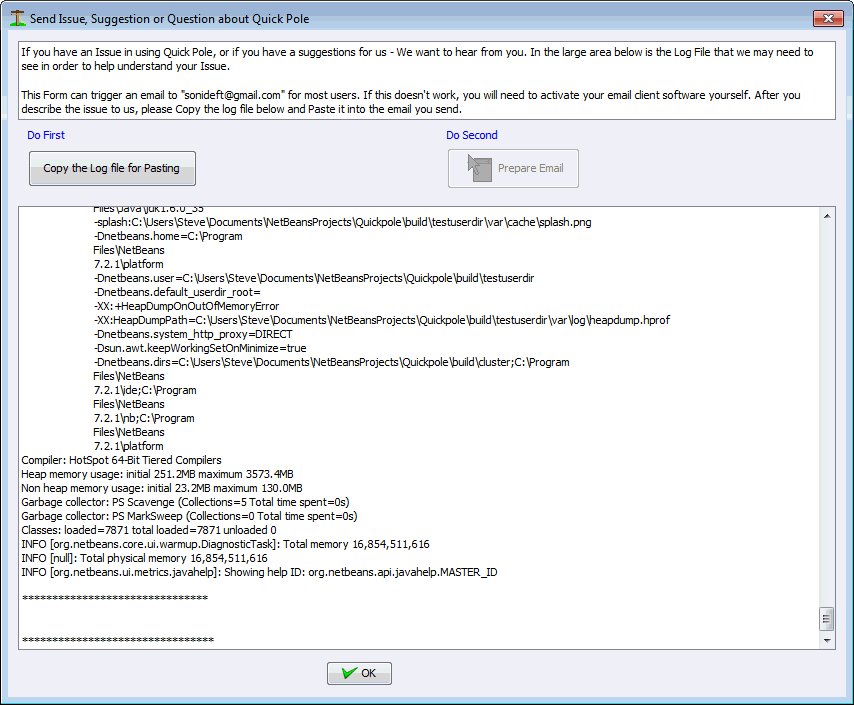
Since Quick Pole keeps an internal log and reports internal details about most problems, this Dialog allows you to copy the current and the previous log file generated by Quick Pole. The “Copy the Log File for Pasting” copies the content in the middle of the Dialog to your computer’s clipboard. The second button “Prepare Email” attempts to launch your default Email software and prepares an Email to us. In the Email, please describe in your own words and provide contact info so that we can discuss the issue further with you, or to communicate when it has been found and repaired. After that, paste the contents of the clipboard into the body of your Email. This is usually done with the key sequence CTRL-V or a menu item edit->paste; or similar. Then send the Email to us and press the OK button to close this dialog.
Since some errors can be related to your computer, it is suggested that you save your files and restart your computer; in case that provides some immediate relief.
License Manager
This option is used to install a Licence initially or to gather information on your current license for Quick Pole. This menu item brings up the License Manager Dialog. There all details of the currently installed license are displayed.
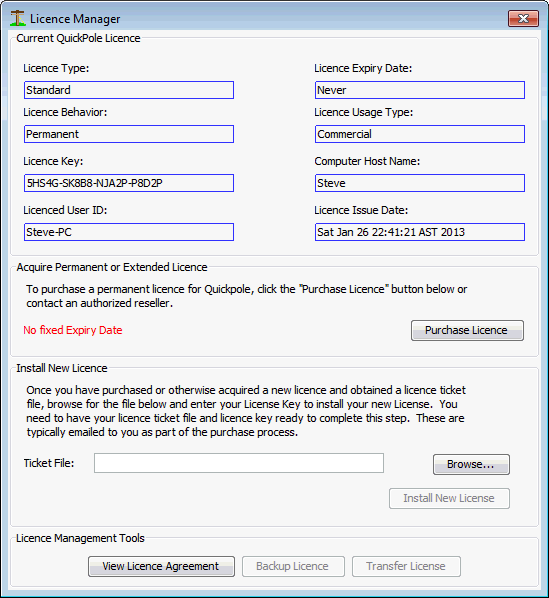
This Dialog can tell you when your temporary license will expire and enables you to install a new permanent license ticket file that you purchase from Sonideft.
The current License Agreement that governs your use of this software can be displayed easily by pressing the “View License Agreement” button. Pressing the “Purchase License” button launches your Internet Browser and goes directly to the page on our website that describes how you can purchase a permanent license.
Check for Updates
This menu choice forces Quick Pole to check to see if there is a new program update available. If there is, you can download and install it right away. Quick Pole does this check every time it starts up, but does not install the updates until the next time Quick Pole restarts. It is good practice to shutdown Quick Pole at the end of each day to ensure you always have the latest program updates.
About
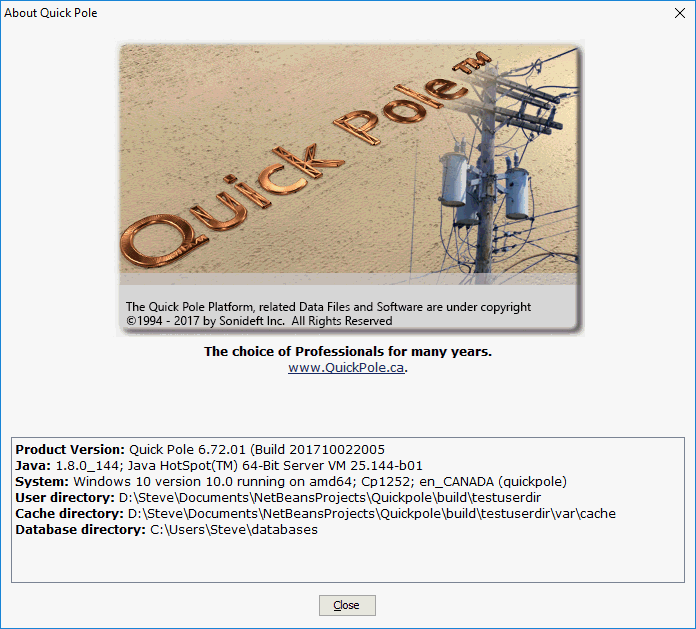
This brings up the common “About Dialog” that shows information about the current version of Quick Pole, some directory settings and some information about your computer.
File Window
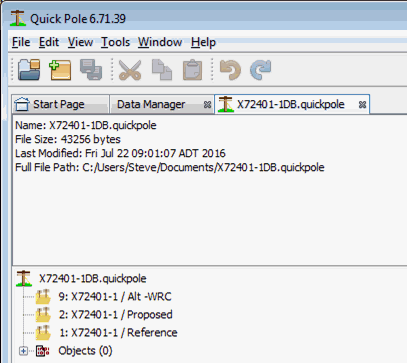
A File Window appears after using the File->Open menu item. It is a view into the contents of a Quick Pole Project File. Each Quick Pole file is capable of storing multiple versions of the same project (alternative designs). In addition, reference information used from Databases is included in an Objects List so that users without the same Databases can open and use the project file without limitations.
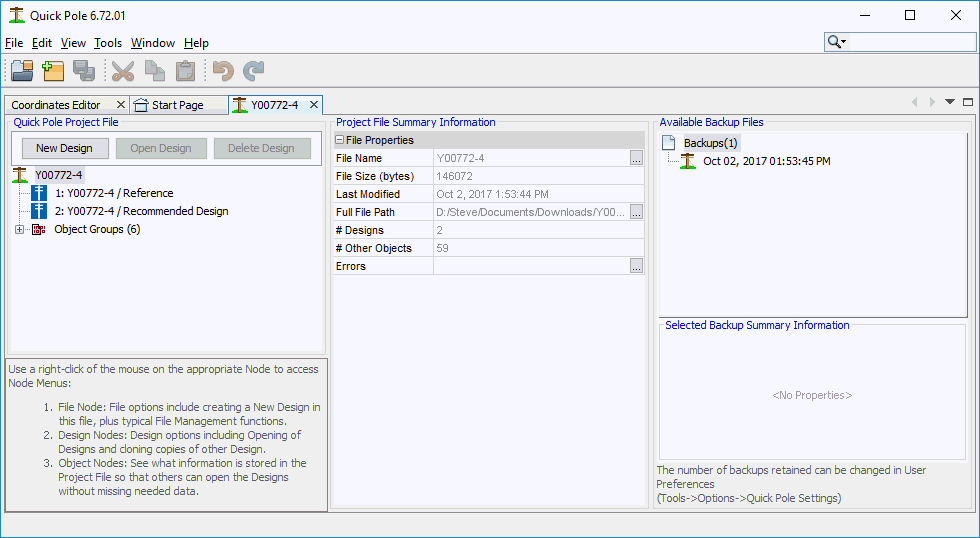
The left-hand area shows the structure of the project file broken out into Designs and Object collections. Selecting the File Node as shown above will populate the File Properties Window in the middle area to provide other useful information.
The right-hand side shows the backup files created for this individual project file. Each time a project file is saved, a backup file is created with the previous file's content. The number of backups retained depends on project saving history and a configurable maximum number of backups defined in your preferences. By selecting a backup file, summary information will be presented in the Properties Window below the list.
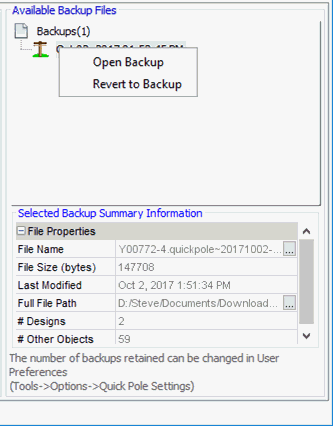
There are two options you can use with these Backup files. You can Open a backup file which will allow you to Open it in Read-Only mode. The purpose of this Open function is so that you can better understand the content and state of this Backup file. The second option "Revert to Backup" will replace the current project file with this file entirely. It is always recommended to open a read-only copy first to make sure you want to do this. The current project file will become one of the new backup files once this option is finished.
File Node Operations
By right-clicking of the mouse, a menu of choices will be presented:
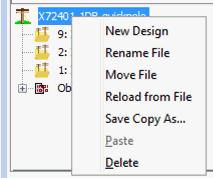
New Design
This function will create a new Design within this Project File based on the User Default Preferences. A new Design will be added to the current list of Designs in the file (if any).
Rename File
This function allows you to rename the existing Project File to something else. The location where the file is stored will stay the same.
Move File
This function allows you to move the current Project File to a different location on you computer, another server, or any other location that your computer can reach.
Reload from File
This function discards any changes that may be pending for saving and reloads the Project File.
Save Copy As...
This function takes a copy of the current Project File and stores it under a new name and file location of your choosing. Any unsaved changes to the original Project File are included in this copy.
Paste
This function is enabled if there is a Design available for Pasting into this Project File.
Delete
This function will delete this Project File. Behind the scenes, this Project File will actually be renamed so that it becomes unavailable to open as a regular Project File.
Design Node Operations
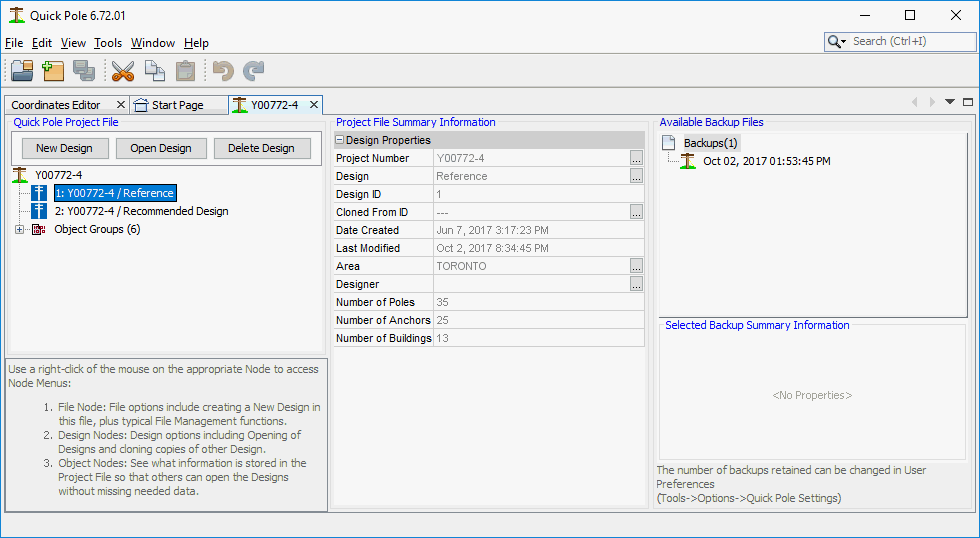
When you select a Design Node by left-clicking once with the mouse, the Properties Window populates with summary details about that specific Design.
Drag & Drop
If you have more than one Project File Window open, Drag and Drop functionality is available to move Designs from one file to another. This feature works best if both Project File Windows are visible at the same time. You can float one window to another monitor or area of your screen. You can also drag one of the windows (use the Window tab) until it docks into the Main Window until the Windows are split horizontally, such as this:
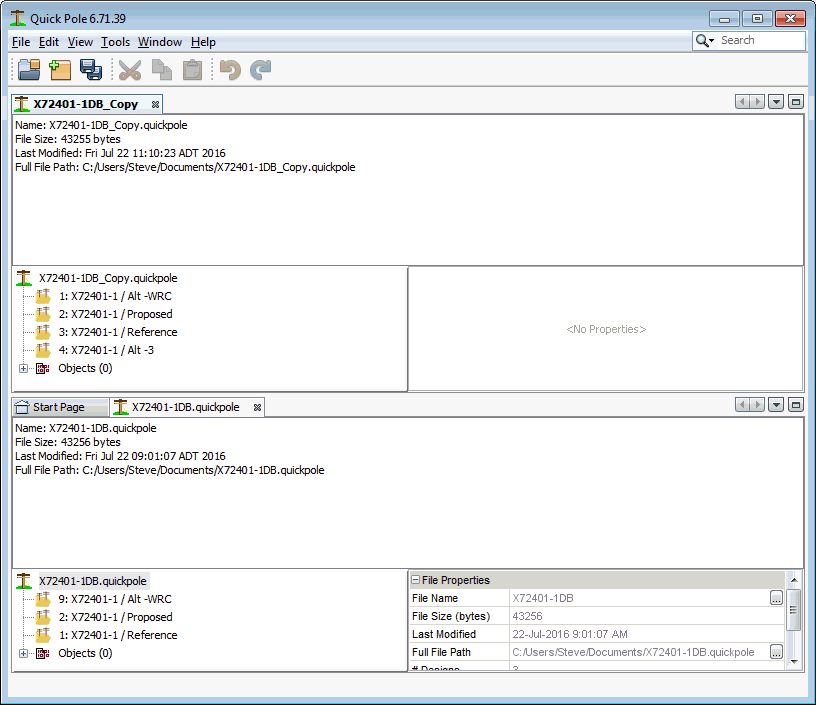
When finished, you may want to Reset Windows via the Windows Top Menu. You could also drag one window to Dock into the same Window group as the other.
By right-clicking on a Design Node, the following functions become available:
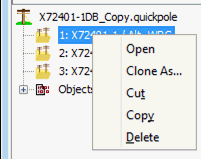
Open
This function opens the selected Design into a separate Design Window.
Clone As...
This function makes an exact copy of the current Design and pops-up a Dialog Box where you can enter the desired name for the cloned Design.
Cut
This function removes the selected Design from this Project File and prepares to Paste it into another Project File.
Copy
This function copies the selected Design from this Project File and prepares to Paste it into another Project File.
Paste
This function pastes the previously Copied or Cut Design into this Project File.
Created with the Personal Edition of HelpNDoc: Free Kindle producer
