Import KML file
Adding Poles to a Quick Pole Project is often one of the first activities when beginning a new project. Quick Pole needs to know where poles are in relation to each other in order to calculate span lengths and angles properly. This also needs to happen before any attachments can be added to the spans. Please note that the KML/KMZ file format only supports the location of items and cannot be used to add equipment or other attachments.
There are a couple possible ways you may be able to provide Quick Pole with this information electronically.
One way is from surveys that have been collected in the field with instruments of reasonable accuracy. These devices can export their collected data in various formats, including KML or KMZ.
Alternatively, GIS systems may exist with the data and could also export in KML/KMZ format. Please be aware that many GIS systems record locations with low accuracy since asset management doesn't need to be as precise of pole loading analysis. However, the data can still be imported and then adjusted for your project if you combine it with field data you have collected for span lengths and line angles (covered later).
Three different KML file formats are supported:
- KML file (usually provided as KMZ) with separate folders in the data for different item types (Poles, Anchors, Buildings, Signs...)
- KML file with one Folder of Data with the type of Data provided in the Name field.
- KML file with no Folders of Data but with multiple Placemarkers containing poles. The pole number is in the name of the Placemarker field.
KML Import Process
A KMZ file is simply a KML file that is compressed; like a zip file. Quick Pole can read either file format. For ease of use with some GIS systems, Quick Pole also accepts zip files containing the same type of data.
Pressing the "Import" button in the Coordinates Editor window will bring up the Import Data Wizard:

Select the “File” option and then press “Next” to go to the next step in the process.

Select the file you want to Import and Press “Next”. After it looks in the file, it discovers the content within.
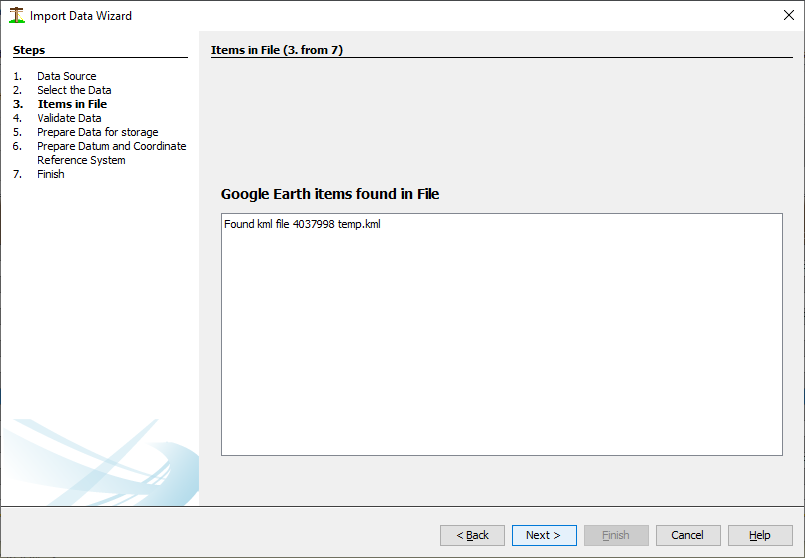
Press “Next” to continue.
Now Quick Pole looks through the data even deeper and will discover multiple data folders, if they exist. Each type of item in the file is expected to be in a different folder. All we need to do is to tell Quick Pole which folders correspond to what we are looking for (Poles, anchors or Buildings).

For each folder shown in this screen, you need to assign it to one of the categories in the drop-down list. The category of “Other” is there to tell Quick Pole that it can ignore that particular item.
There are two items to choose from for poles (Pole and Pole Edge). If your survey technique includes recording two points on different sides of the pole, you can use one item of each type per pole and Quick Pole will automatically calculate the absolute center of the actual pole.
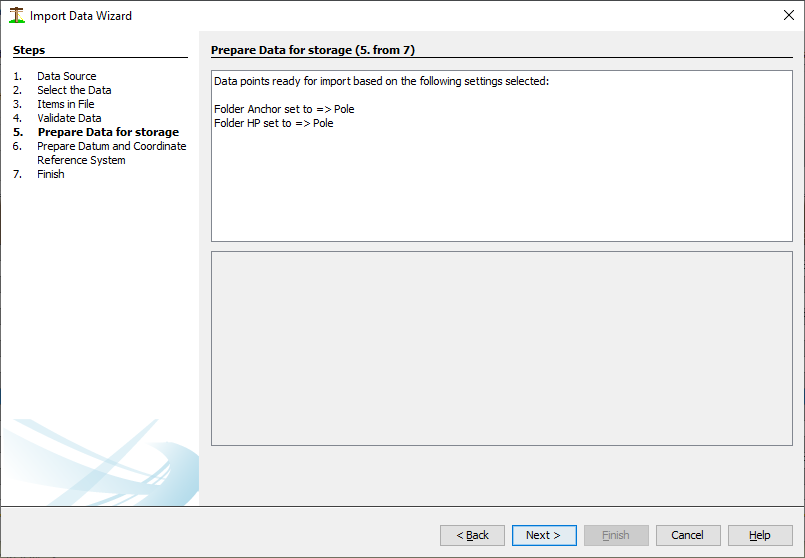
Assign each folder to a category and then press “Next”. Please note that you should have at least one folder assigned to the category of “Pole”. This example has only two folders, but your GIS system many generate several. The next screen will confirm to you the folder settings you have selected.
One benefit of using the KML format for GIS coordinates is that all data uses a standard reference Datum (WGS-84). This is how Google Earth defined the format initially.
Quick Pole is able to use this same reference Datum, or any other of your choosing. In this next screen you must choose what your project will use.
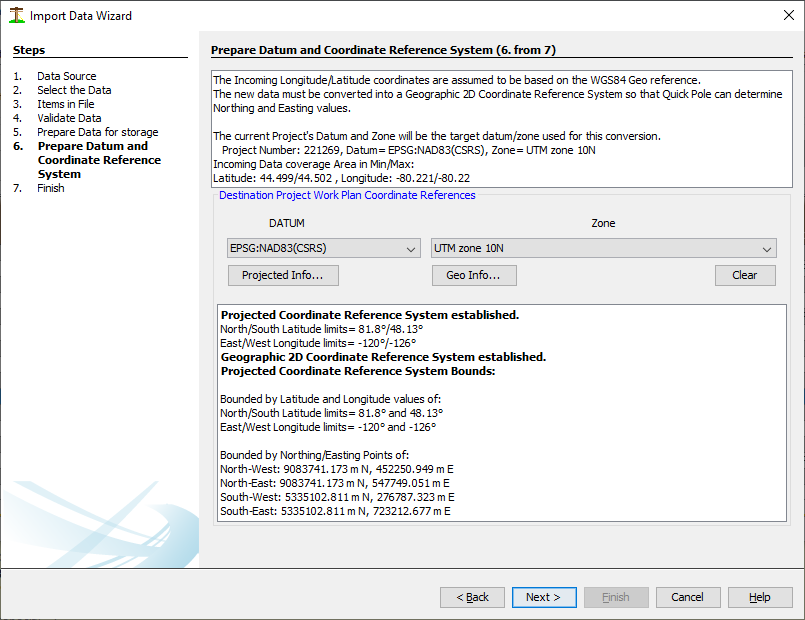
GIS coordinates (using longitude and latitude degrees), based on any Datum, need to also be referenced to a Zone for use in Quick Pole. The Zone is used on many printed maps and helps make the connection between degree coordinates and distance measurements (Northings/Eastings) possible. Choose the new Datum and Zone that best fits the needs of your organization. If unsure which is best, keep it at WGS-84 and select your zone based on your knowledge of the area or via an Internet map search. Once selected, the screen will show you the defined bounds of what your selection represents. It provides these bounds both in longitude and latitude degrees, plus Northing and Easting values. You should review this to confirm that it makes sense to the area of your project. The below example did not select a valid choice, but it does give you hints as to the area covered by both the data and the Datum/Zone.
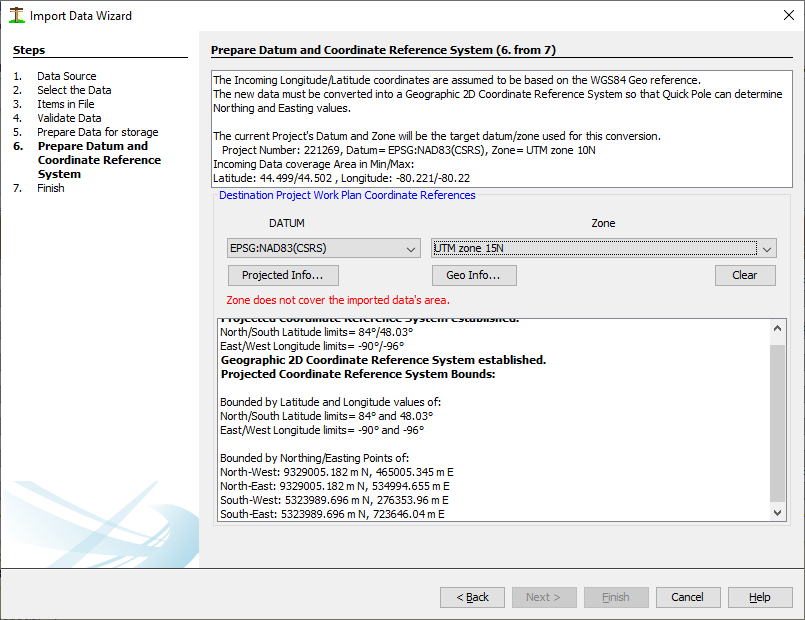
Quick Pole will not continue with the Import until this results in a valid match. Once complete, it will display a summary of the Import results so that you know what and how many items have been imported.

Press “Finish” to close out this wizard.